Duck a L’Orange
When you think about classic, old-school recipes, Duck a L’Orange is always one that springs to mind. This ridiculously famous dish cut its teeth in the 70’s and 80’s in French restaurants all around the world. While it may have fallen a little bit out of fashion in modern times, it’s still one of the best, classic dishes you can eat in our opinion. Beautifully cooked Duck that sits on a bed of silky, buttery, Orange Sauce that tastes simply divine. The classics are called that for a reason, and in our opinion this recipe is just as good now as it was back in its heyday!
The key to a great Duck a L’Orange lies in that beautiful Sauce
There is no mistaking a Duck a L’Orange sauce. It is truly one of the most unique and delicious sauces in the culinary world. The sauce is quite simple to make, however, and its core is one of the classic French ‘mother sauces’ known as Espagnole Sauce (or Brown Sauce)
There is no mistaking a Duck a L’Orange sauce. It is truly one of the most unique and delicious sauces in the culinary world. The sauce is quite simple to make, however, and its core is one of the classic French ‘mother sauces’ known as Espagnole Sauce (or Brown Sauce)
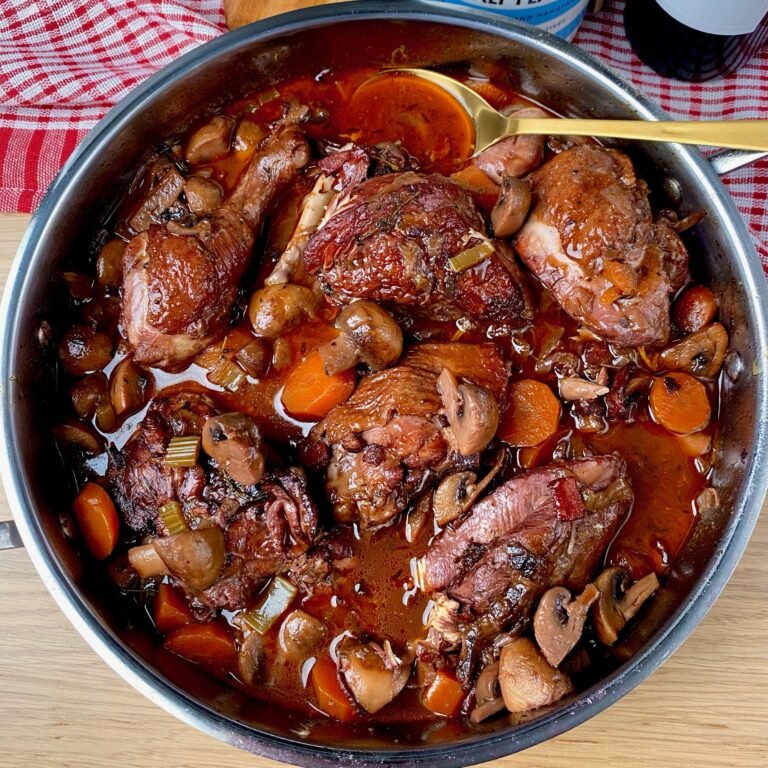
The sauce is made by first frying off some beautiful chunky pieces of Bacon. Once all of that delicious Bacon fat has rendered out and into the pan, time to add the Onions. Cook the Onion down for about 5 minutes over medium heat until it’s tender and begins to slightly caramelize
Then, into the pan goes the Carrots and Celery. This combination of Onion, Celery, and Carrot is known as ‘Mirepoix’. It’s a fancy cooking term but is compiled of very simple and humble ingredients. A Mirepoix is used as the base for so many sauces and recipes because of the wonderful flavors it produces. The natural sugars of the vegetables are cooked out in the pan, infusing it with the most delicious flavors
Once you’ve cooked out the Mirepoix it’s time to get serious!
After about 5 more minutes in the pan the vegetables will begin to caramelize, and their wonderful flavors are coming out. At this point a classic roux is added to the sauce. A roux is basically formed by combining equal parts Butter and Flour. A roux is most popularly known as the core component of a classic Béchamel Sauce. However, it’s also used when making Espagnole
Mix all that in for about 3 – 4 minutes so that the Flour cooks off, then add your Beef Broth. For our recipe we use 2 cups of Beef Broth, but we recommend using as much (or as little) to form a smooth, slightly thick sauce
You don’t want the sauce to be too thick. Just enough that it will subtly coat the back of a spoon. If it’s too thick, just add a little bit more Broth. Too thin, you can always make a little bit more Roux in a separate pan and then add it back into the sauce
Cook this down for about 15 minutes and then strain the sauce through a sieve. It always seems like a shame to say goodbye to such delicious ingredients that have helped to build flavor in a sauce, but that’s how it goes! Return the now strained sauce back into the pan over a low heat and squeeze in the juice of 2 Oranges
How ‘Orangy’ should my sauce be?
The funny thing about Duck a L’Orange is that many times I’ve eaten this dish at nice restaurants and the Orange flavor is very subtle. Surprisingly so for that matter. I’d expect the Orange flavor to be at the forefront of the sauce, but a classic Duck a L’Orange is much more subtle. You want to be able to taste the Orange, but not so much that it overpowers all the other delicious ingredients in the sauce
All I can suggest is, like all home cooking, it comes down to personal preference. Start by squeezing the juice of 1 Orange into the sauce and see what it tastes like. Oh, also be sure to season the sauce well with Salt. Adding Salt will help to make all the flavors more pronounced. So, you may find that adding Salt will be the key to getting more Orange flavor in the sauce instead of simply pouring in more Orange Juice!
For our recipe we’re using the juice from 2 Oranges. You can also add even more Orange flavor into the dish by adding the squeezed Oranges into the pan and letting them steep in the sauce for about 5 minutes. Remember to take them out before serving, however!
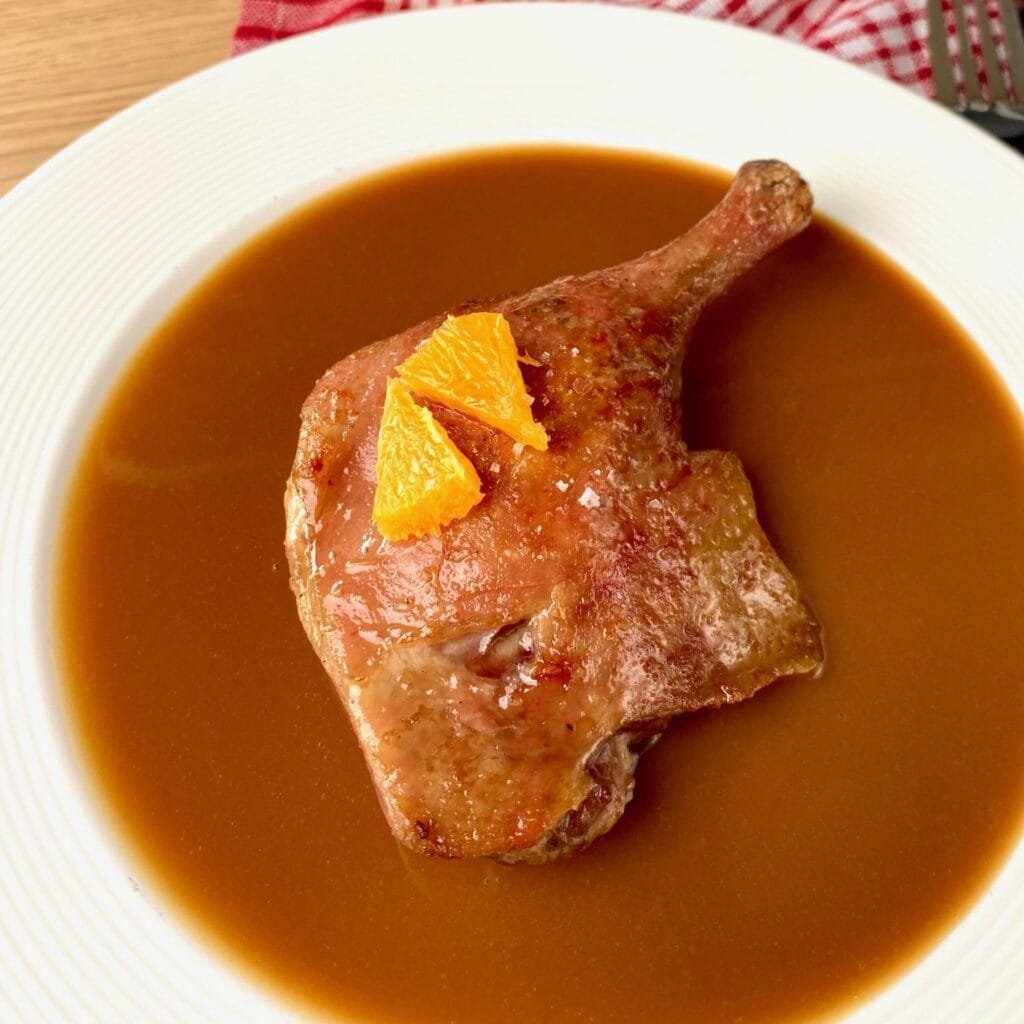
I like to reserve half an Orange for plating. You can have some fun with presentation by cutting up the Orange into nice shapes and placing it over the Duck once you’ve finished plating. Just remember to remove the Orange peel, as you want to ensure everything that ends up on the plate is edible
Now, moving onto the star of the dish – the Duck!
It’s no secret that we’re big fans of Duck here at Dinnertime Somewhere. We’ve got loads of delicious Duck recipes and are always finding new ways to enjoy this wonderful protein. It is, therefore, somewhat of a surprise it’s taken us this long to publish our Duck a L’Orange recipe
There are loads of ways you can prepare your Duck for a Duck a L’Orange. There’s no real ‘set’ method. Nor is there a specific cut of Duck that you must use. Unlike the sauce, which is very specific with its technique, You can happily enjoy an amazing Duck a L’Orange with all sorts of amazing preparation of Duck
A few options that you can consider are to create an amazing Duck Confit by slowly cooking the Duck in fat (either Duck fat or Oil) in the oven over several hours. You can also simply pan fry some beautiful Duck Breasts and slice it on the diagonal for a beautiful presentation
For our recipe we’re using Duck Thighs, and here’s the trick to getting the skin super crispy every time
For our recipe we’re using Duck Thighs with the drumstick attached. Of course we’re cooking the Duck with the skin on, as that is the best part of the Duck! Getting the skin crispy is a critical component when cooking Duck
Our technique involves two steps in the preparation phase. The first is to leave the Duck on a plate, uncovered, in the refrigerator. For the best result we recommend leaving it for a few days, but simply leaving it overnight will work
The cold, dry air of the refrigerator will dry out the skin of the Duck. You’ll notice a significant change in the appearance of the Duck during this time. It will turn significantly darker, which is totally fine
The second technique is all about helping the fat to render out of the skin. To do so, prick loads of tiny holes in the skin. We simply use a threading needle to do so, but anything sharp will work. Just be careful not to prick the skin too deep, you don’t want to pierce the flesh
Cooking the Duck
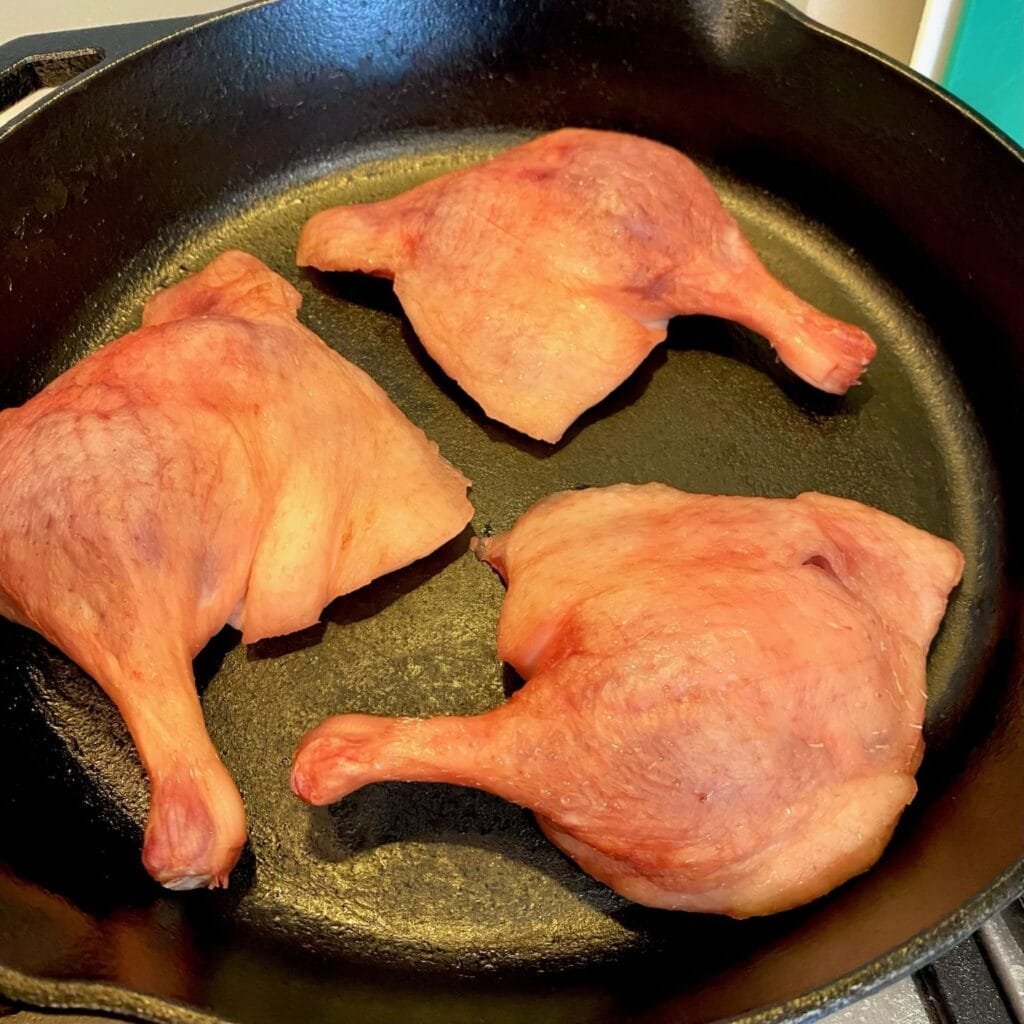
Once the Duck is ready to go, leave it out at room temperature for at least 1 hour before cooking. This will ensure an even cook throughout. Place the Duck Thighs on an oven safe container (best bet is a Cast Iron Skillet). Season with Salt and then place the pan in an oven pre-heated to 280F (140C). Cook it for about 20 – 25 minutes until the internal temperature of the Duck is 120F
We cook the Duck over a low temperature as this allows the Duck fat to slowly render out of the duck. You’ll notice two things occur during this process: First, the beautiful Duck Fat will begin to pool in the pan. Secondly, the Duck Skin will be super-crispy by the time the meat is completely cooked
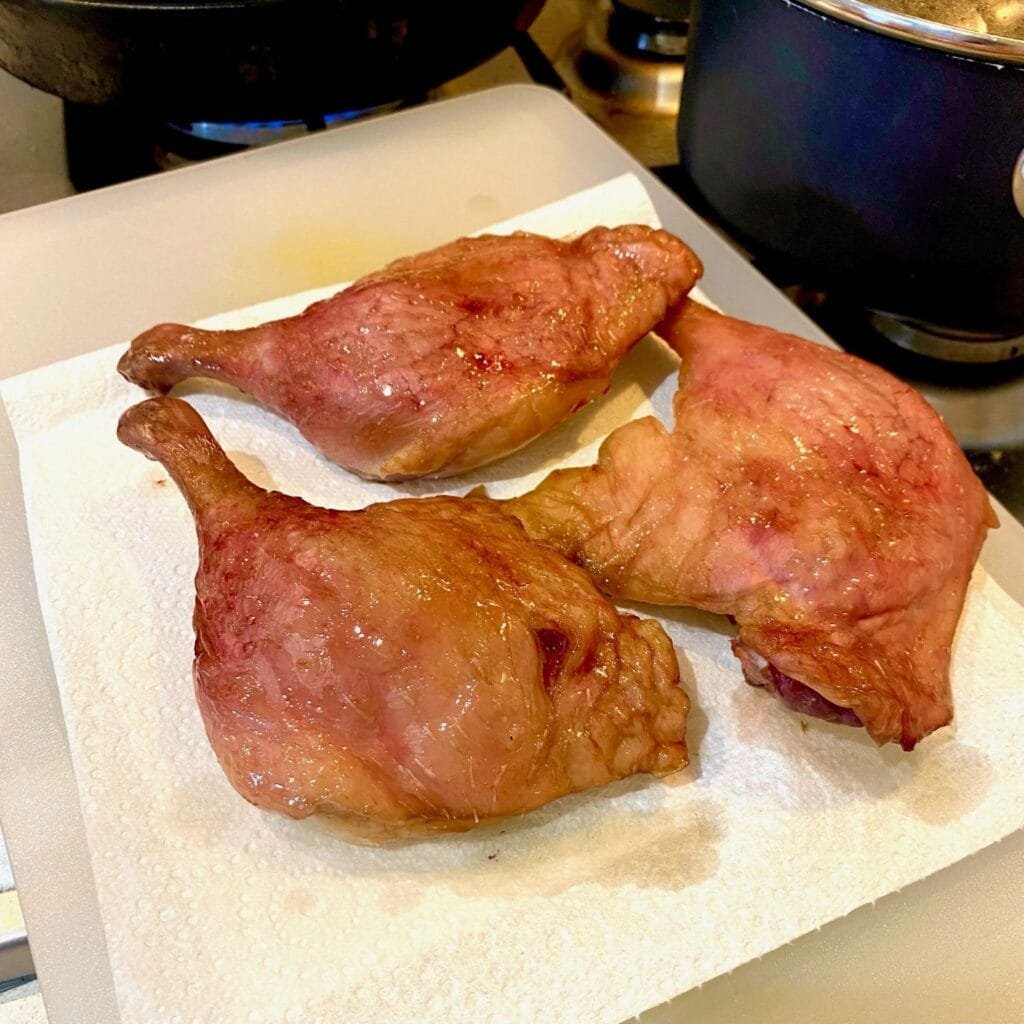
Remove the Duck from the pan and then set it over a medium high heat on the stovetop. This final step is all about getting the skin even more crispy and adding a bit of color to the Duck. The Duck Fat that is now sitting in the pan will act as a fat to color and flavor the meat. Just be a little careful as it does tend to spit a bit
I like to use the Duck fat like a baste. Allow the Fat to pool at one end of the pan (by tilting it toward you) and then ladle the fat over the Duck skin using a large spoon. This is best to do off the heat. Don’t worry, the residual heat of the Duck Fat is ridiculously hot!
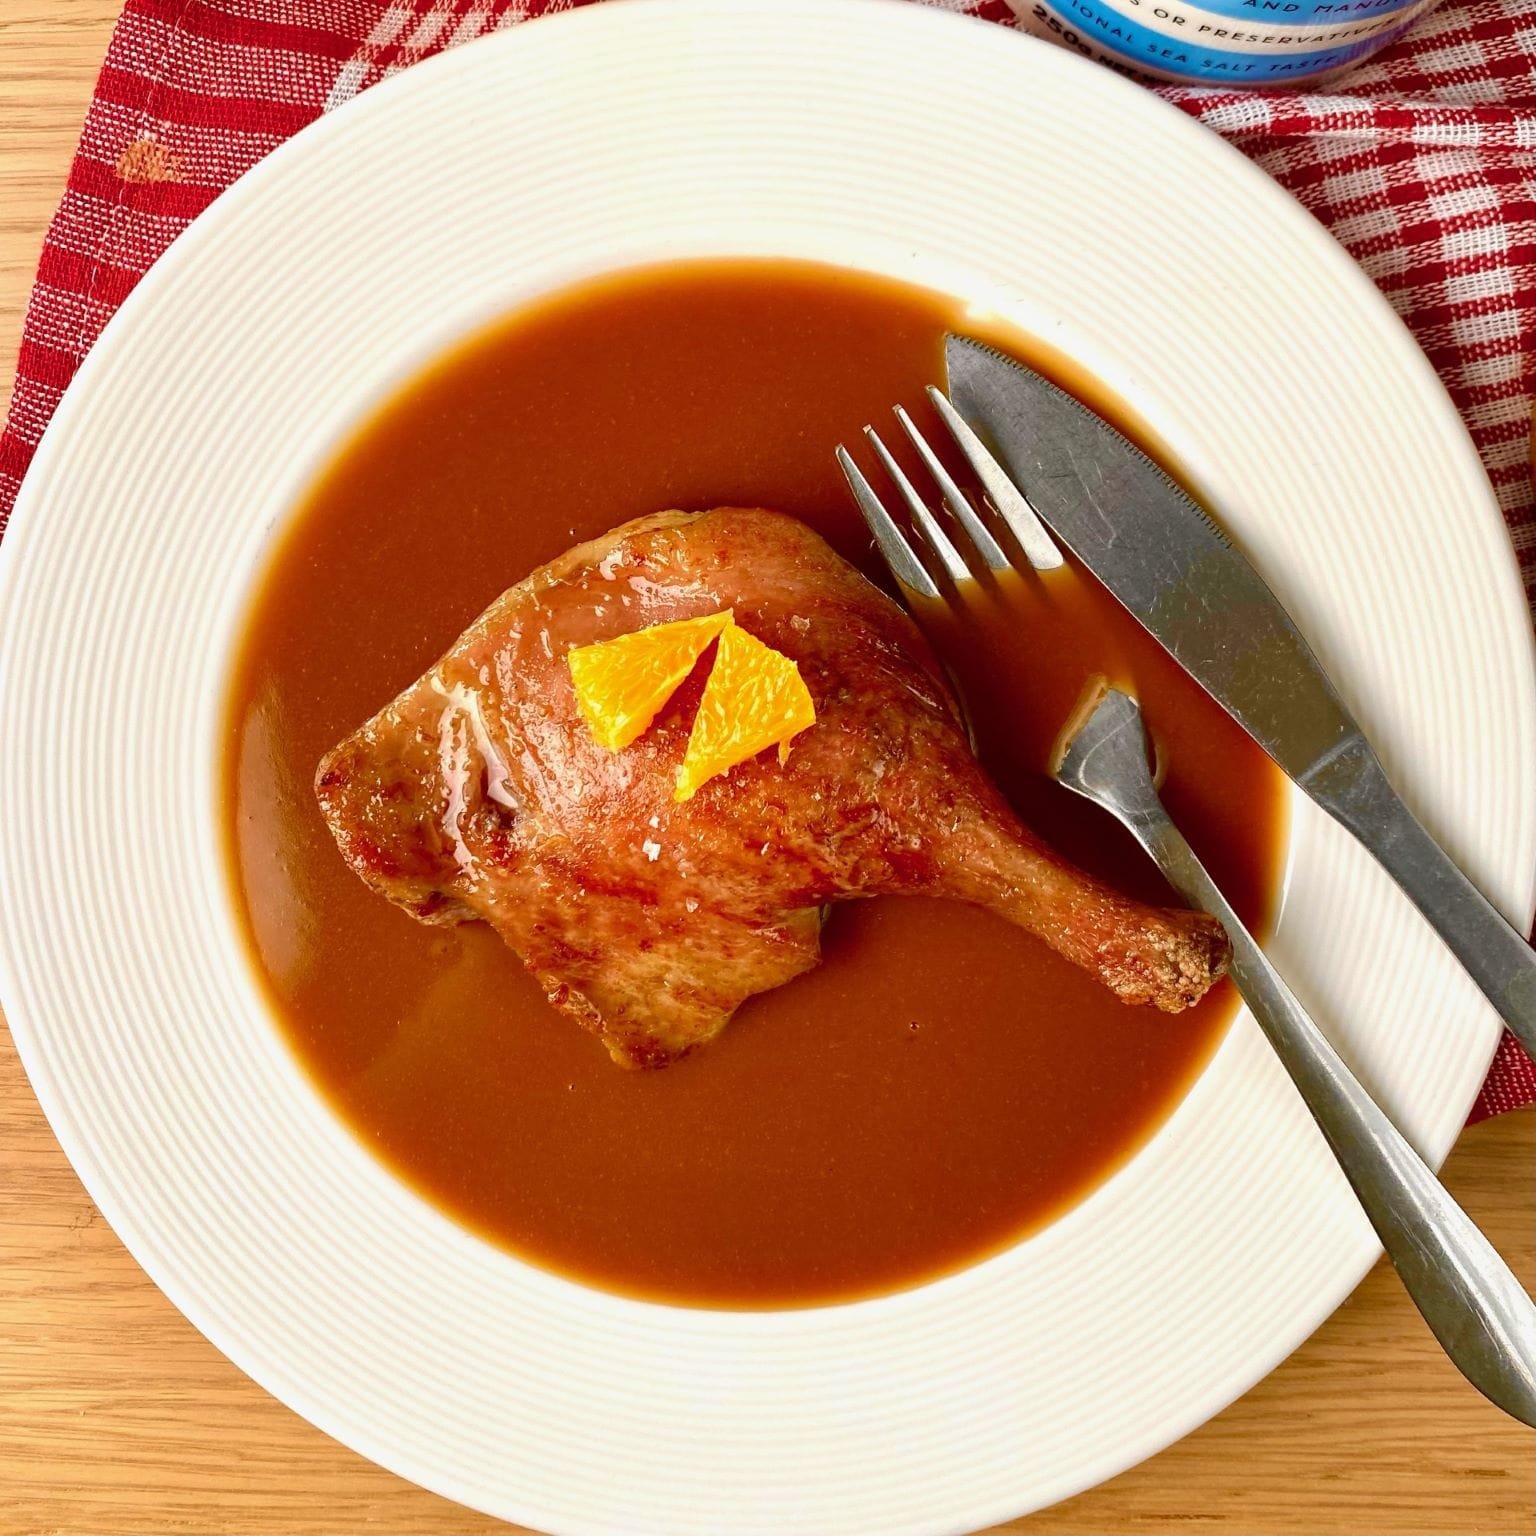
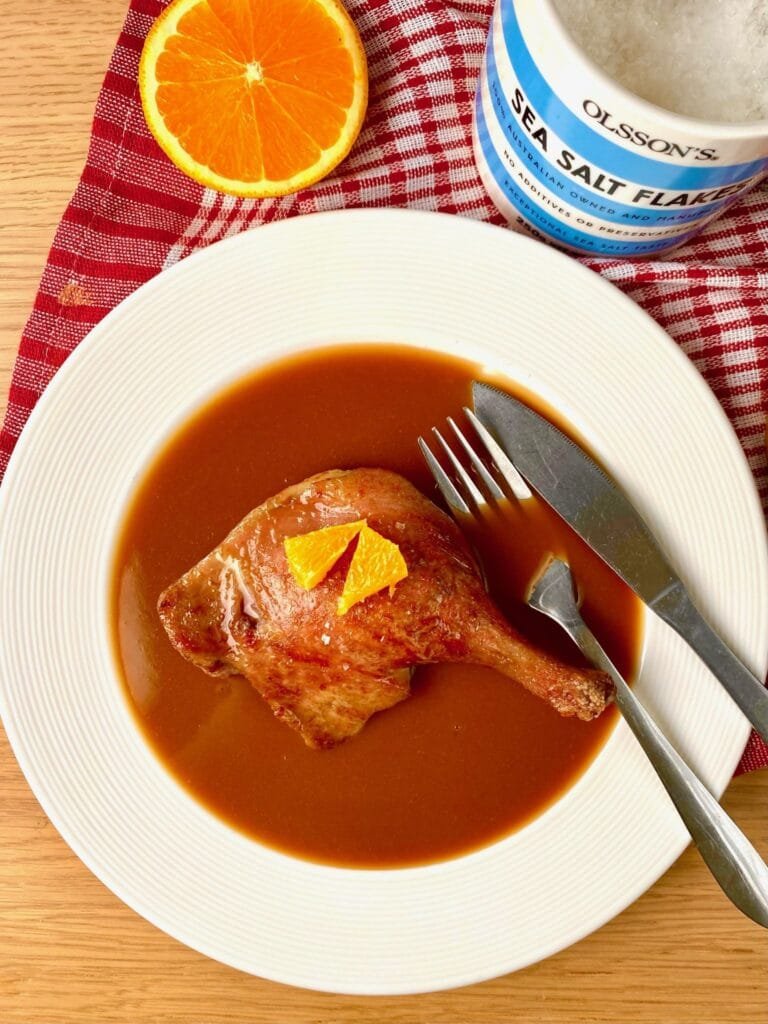
Once the skin is crispy and golden, remove the Duck from the pan and allow it to rest for at least 10 minutes before plating. To plate, pour a generous amount of that delicious Duck a L’Orange sauce on a plate or bowl and sit the Duck on top
This recipe will produce enough volume for 4 plates of delicious Duck a L’Orange. It’s not the most filling of dishes, so we recommend going all-out in your French cookery and serving it with a side of some amazing Buttery Mashed Potatoes for the perfect meal
Recipe Details
4 – 8 people
15 minutes
40 minutes
55 minutes
Duck a L’Orange Recipe
Ingredients
- 4 Duck Thighs / Maryland’s (skin on)
- Juice of 2 Oranges
- 6 Bacon Rashers, diced
- 2 Carrots, diced
- 2 Celery Stalks, diced
- ½ Yellow Onion, diced
- 1 tbsp. All Purpose Flour
- 1 tbsp. Butter
- 2 cups of Beef Stock (recipe here)
- Salt
Instructions
- Place the Duck on a plate, uncovered, in the refrigerator overnight to dry out the skin. When ready to cook, set at room temperature for 1 hour prior to cooking
- Place the Bacon in a large pot over medium heat and cook until the fat has rendered (about 5 minutes). Add the Onions and cook for 5 more minutes, stirring often
- Add the Celery and Carrots and cook for 6 – 7 minutes, then add the Flour and Butter
- Cook for 4 minutes, stirring constantly to cook the Flour through. Add the Beef Broth and bring to a Boil. Drop the heat to low and simmer for 15 minutes. Season well with Salt
- Strain the sauce through a fine sieve and discard the vegetables. Return the sauce to a pan and set aside
Cooking the Duck
- Season the Duck with Salt and then place onto a large oven-safe pan such as a Cast Iron Skillet. Roast in the Oven at 280F / 140C for 20 – 25 minutes until the internal temperature of the Duck is 120F
- Set pan over a medium high heat and sear the duck skin. Turn Duck over and use the rendered fat in the pan to baste the Duck skin for a few minutes. Set Duck on a flat surface to rest for 10 minutes
Finishing the Sauce and Serving
- Once your Duck has rested set the saucepan with the sauce over a low heat and add the Orange Juice. Mix well and taste for seasoning, adjusting if necessary
- Ladle sauce to coat the base of your plates then place the cooked Duck on top. Season with Finishing Salt and serve with some freshly cut segments of Orange
Recipe Notes
- You can leave the Duck in the refrigerator for up to 3 days before cooking. The longer you leave it, the crispier the skin will become
- For even more Orange flavor, try adding the Orange Peel from the squeezed Oranges into the Sauce. Discard before serving
We highly recommend you try out this classic Duck a L’Orange recipe at home. It’s a great nostalgic trip back to the 70’s and 80’s and you’ll just love the flavors in this recipe!
For more amazing Duck dishes, check out these favorites of ours:
Happy Cooking!